Showing posts with label Pinterest Diaries. Show all posts

Friday, February 12, 2016

Pinterest Diaries: Quinoa Pizza Bites


Winter is a tough time for me. I feel like it is for most people living in areas where there isn’t much sun or warmth. Luckily, it has been much warmer than usual but as we here in Massachusetts get ready to brace ourselves for a Valentine’s weekend where the temps will go below zero I want to talk about something that warms my heart. Something that comforts me and doesn’t judge me, a true beacon of hope when all else seems amiss - and that, friends, is Pizza.


I love pizza. You know those people who say there is no such thing as bad pizza? I disagree. There are varying degrees of goodness and so much to consider - sauce, cheese blend, cheese stretch, crust, toppings, things to shake on it, things for it to be dipped in… It is enough to make this fat girl cry. I eat all kinds of pizza from like really high quality to really shitty take out to an array of frozen. [PSA: If you need a frozen pizza and can be ok with spending like $9 on it, PLEASE try Screamin’ Sicilian. Hands down the best frozen pizza I have ever had. One I would eat over some take out places.] I will take it in any form. I love pizza rolls and pizza-dillas equally. Deep dish or thin crust, I DGAF - just gimme dat pie!


If you have been here before, you may be wondering how I eat all this pizza and keep talking about being Gluten Free. The answer is that there are a few things in this world where I will invoke #YOLO and eat wheat only to *sometimes* regret it later (sometimes I find it worth it. DON’T BE LIKE ME. BE STRONGER THAN THAT). Pizza is at the top of my list. With the winter woes taking hold I have been extra hard on myself about this. Some of it is purely economical because GF stuff, especially GOOD GF stuff, is often pricier. Some of it is that I prefer to cram feelings and insecurities down by way of food. I decided I needed an easy way to get pizza without wanting to die after.


I pinned a recipe for Quinoa Pizza Bites a few weeks ago and decided to give it a try. It seemed fairly inexpensive and easy to do, which it was. It called for a mini muffin pan and if you have one I highly suggest using it to avoid touching the raw mixture. They were really good, held their shape well, and were filling. The Husband annihilated them, so two thumbs up from them? It is easily something you could make vegetarian as well. Maybe vegan? But I am not really sure if there is a vegan substitute for eggs and didn’t research that before writing this (sorry!).


Ingredients
1 cup of cooked Quinoa (I used white and the recipe calls for that but I feel like this could be mad good with couscous or another type or quinoa. Shit, even rice. **I did NOT cook this ahead of time, which I told myself to do multiple times. I suggest doing it ahead of time so it is easy to handle)
⅓ cup of pepperoni (I used sliced pizza pepperoni that I cut up. I could see how using a stick would also be good)
3 large eggs (I used 2 because I DO WHAT I WANT, RECIPE. DON’T TELL ME WHAT TO…. oh, that is what you are there for)
1 Cup of mozzarella
¼ tsp salt
Optional: Marinara/spaghetti/pizza sauce for dip dips


Cook the quinoa as directed on the package. If you are Fancy AF like me, substitute stock for water to impart more flavor on those magic grains. Again, I suggest doing this ahead of time and letting it cool.


Preheat your oven to 350.


Chop up your pepperoni. I cut them in stacks into four strips then in half.

This is where I went rouge. Unless this is your first time reading a recipe here, you are probably surprised it took this long but I supposed not pre-cooking the quinoa was my first step to being a rebel.


It calls for ⅓ cup. I used about half. Maybe more. I also suggest making sure there is some for your snacking pleasure.


Season your quinoa. I don’t know if you noticed the lack of seasoning listed above. WHAT MONSTER DOESN’T SEASON SOMETHING? NOT ONE SINGLE GRAIN OF GARLIC POWDER MENTIONED?IN WHAT WORLD IS THE HOLY TRINITY NOT A STAPLE? One I don’t want to live in, clearly. I added salt, pepper, garlic powder, basil, and red pepper flakes… and some parmesan cheese. Mix and taste. Add more as needed. One thing I wish I knew ahead of time was that after the eggs are added and it bakes, the flavor mellows out A LOT. So bump up that flavor.

Add pepperoni and cheese. I didn’t measure and just threw in a few paws full... Nor did I use a straight mozzarella cheese. I went Italian style blend. I feel like my batch needed more cheese but that is possibly my own fault for not following directions. Combine.
 

Crack on your eggs and mix well.


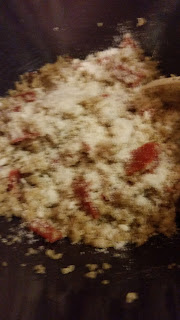
If you are a super adult and have a mini muffin pan, spray it with cooking spray and fill it. If you suck at adulting, like me, get ready to hate everything. Just going to free ball it? (Literally. Make balls of this mixture free hand. Pervs.) Dig in. I rolled balls of the mix together then formed weird blobs that were vaguely cookie-esque/cake like. Place these mounds of terrifying texture (which I promise is 10 times better when cooked) on a cookie sheet that you have sprayed with cooking spray.

The recipe said to bake for 25-30 minutes or until browned. I would say I had these in for about 35. I was not satisfied with the browning but they smelled really good and to be honest I find the scent of pepperoni too intoxicating to be patient.

It then suggests you remove the bites and put them on a cooling rack. I chose to pile them on a plate and get to eatin’. You chose.

Wednesday, September 30, 2015

Pinterest Diaries: Enchilada Dip

**Hey, Friends!
I am heading to Flo.Rida (Am I the only one that finds that hilarious?) until Monday. I will be posting pictures and videos on my Instagram and Snapchat (username on both: whofavorsfire). There may be a day at Disneyworld while I am there, so get ready for magical Halloween-y overload!

While I am away, I am going to try this post scheduling tool here on the blog AND on the FB. The posts will be a few food tutorials and post about media I am into. Hoping it goes off without a hitch!

For Labor Day, we had a family shindig and I decided to flex my appetizer skills by making a dip. I scoured the internet looking for something tasty and stumbled across enchilada dip. I LOVE ENCHILADAS. I keep enchilada sauce on hand at all times. Casserole, mixed into Mexican themed rice, mixed into sour cream for added zip, or even just regular enchiladas. I don't discriminate. Get in my belly. Right meow.

After discussing if this was a good plan with The Husband, I took a trip to Trader Joe's to get some stuff.  Here is what the recipe called for:

  • 1½ - 2 pounds ground beef
  • ½ medium onion, diced
  • 2 cloves garlic, minced
  • 2 cups enchilada sauce
  • 2 cups grated Monterrey Jack or cheddar cheese
  • Sour Cream (optional)
  • Tortilla Chips (optional)

  •  
    In my head, I had an idea of what was needed. I know how to make enchiladas and I know how to make dip. So I went into the store sans list. Whoops. I went rogue much sooner than usual. I ended up with:


    Anyone versed in the world of dip making knows that a traditional creamy dip has at least two of the following in it: Sour Cream, Cream Cheese, or Mayonnaise. Consider this dip's holy trinity. I didn't realize heading in that this "dip" I found broke the sacred rule. I ended up using sour cream and cream cheese because #yolo, that's why. I also decided to add bell pepper, beans, and corn to make it a bit more hearty. I also swapped ground beef for ground turkey and used a mix of red and green enchilada sauce. PLEASE MAKE SURE TO READ YOUR LABELS IF YOU HAVE DIETARY ISSUES. After eating a metric shitload of this dip, I got really sick. The extremely delicious Trader Joe's enchilada sauce (my g-d go to sauce) has wheat in it. Use a GF sauce if you need to steer clear of those amber waves of grain.

    Let's get down to business (to defeat the huns? #accidentalDisneying):

    The recipe's instructions:
    1. Brown ground beef in a large skillet. Drain. Add in onion and garlic and cook until tender, about 3 minutes. Stir in enchilada sauce and top with grated cheese. Cover and allow cheese to melt, about 3 more minutes.
    2. Top with sour cream and serve with tortilla chips.
     
    TOO EASY. NOT TASTY ENOUGH. MPA MAD! MPA SMASH PUNY RULES!
     
    Here is how I did it:
     
    1. Heat olive oil in wok. Add turkey. Break it up and season with salt, pepper, garlic powder, and cumin.
     
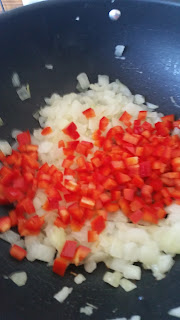
    2. While that is browning, prep your veg. I bought pre-diced onion so I just had the pepper. De-seed and de-rib, dice.
     
    3. Once the turkey is cooked through and browned some, drain. Leave in colander until needed.

    4. Add a smidge more oil to the wok. Toss in onion and pepper. Hold off on seasoning until they cook down. Then add some salt, pepper, garlic powder, and cumin.


    5. Add beans and corn. Cook until they are warmed through.
                                             
     
    6. Add turkey and mix together. Add in enchilada sauce and cook down for 5 or so minutes, stirring occasionally. Taste and season as needed/if needed.
     
    7. Add shredded cheese and mix until melted.
    8. Add cream cheese and mix until melted and incorporated through entire dip. Then add about 1/4 cup of sour cream (this was eyeballed, using a fork because I am nothing if not a scientist) and mix.                                         

    9. Grab some chips and enjoy.


    Wednesday, July 1, 2015

    Pinterest Diaries: Pizza-dilla

    The Husband and I are quesadilla people. There was a time when we had them once a week. We have even had a dinner party that involved a quesadilla bar. They are fast, easy, tasty, and cheap. Who can argue with that?!? For me.. Well, for us, they just make sense as I almost always have all of the ingredients on hand. Quesadillas in our house are a dinner that relies on pantry staples.

    My normal quesadilla is built like this: tortilla, layer of refried beans - preferably Trader Joe's salsa style, layer of shredded cheese, corn (canned corn that has been drained or frozen that I heat with a bit of butter and the Holy Trinity - salt, pepper, garlic powder [Hallelujah - praise be their grains]), green onion or if I don't have any -which is almost a criminal level offense- I will use a can of green chiles, some more cheese because cheese = life, and a top tortilla. I heat them in a skillet making sure everything is melted and warm, flipping to brown both side. I cut it with a pizza cutter and top with sour cream, guac or sliced avocado, and salsa OR if my saintly in-laws have recently come back from Florida some deliciously spicy BBQ sauce. It normally looks like this:
     
     
    I decided to get cray and make PIZZA-DILLAS. I saw it on Pinterest and thought that it would be a tasty alternative to a regular quesadilla. The pin called for wheat tortillas that are folded in half. I know me and I know The Husband. A full tortilla was going to be made instead of a halved one. It also had a can of sliced mushrooms and a can of sliced black olives as well as pepperoni, cheese, sauce, thinly sliced onion, and thinly sliced green bell pepper. A layer of cheese then the toppings except the sauce, which was solely for dip-dips. Browned on both sides and cut to perfection.
     
    So, naturally (and not surprising if you have read any recipe I have put up here), I went rogue. I held off on the veg to cement the concept for The Husband and to save on money. Here is how it went:
     
    Ingredients
    • flour tortillas (one day I will remember to get GF!) $3
    • a jar of pizza Sauce $2
    • shredded mozzarella $3.50
    • sliced pepperoni $4
    • parmesan cheese - the kind in the shakey thing (had on hand)
    • garlic powder (had on hand)
     
    Total spent: $12.50. It could have been less (by approx. $3-4) if I had shopped somewhere else but I <3 Trader Joe's, so #YOLO. This yields 4 quesadillas if you use my method, or 8 if you use the method the recipe suggests. My method equals ~$3.12 per quesadilla, theirs ~$1.56 . Either way, still not bad. and you can certainly repurpose tortillas not used and cheese for other meals during the week.
     
     
    So let's get to the part we all care about: FOOD PORN.
     
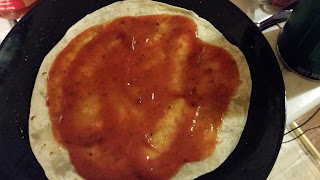
    First, I spread a few large spoonful's of the pizza sauce on one tortilla then sprinkled some garlic powder on it.
     Not that anyone can tell the delicious grains of garlic-y groodness are there.
     
    Next, I added some of that shakey parmesan salty perfection.
     
    Awwwwww, Yesssssss
     
    Next, a large paw-ful  of cheese.
    Pro-tip: clean up the edges of renegade shreds to prevent it flying out during the dilla-flip.
     
    Following the cheesening, top with pepperoni (and veggies or other delicious pizza toppings. GO ROGUE IN THE KITCHEN.)
    Coverage is important.
     
    Now, more cheese but less than before. Just enough to make a cheese seal.
     
    Laying the top tortilla in your hand, spread some more sauce and sprinkle again with garlic powder and parmesan.
    Please note this is before the parmesan was added.
     
    Slap the top on so the sauce meets the cheese. Move to a frying plan on medium low heat. Let one side cook until browned and about half or so of the cheese is melted.
    Mmmmmm, Brown food is delicious.
     
    Gently flip the dilla and do the same on the other side. I like to peek by lifting the top tortilla up to see the progress. Watch out! It gets hot in there.

    Almost ready for OM NOM NOMs
     
    Once out of the pan, I cut it into fourths with a pizza cutter and then BOOM! Dinner is ready. Drop the mic and get ready for your family, partner, friends, EVERYONE to love you just a smidge more.
     
    I will definitely do this again, and I will definitely add vegetation to the mix. 


    Thursday, February 12, 2015

    Pinterest Diaries: Beer and Brown Sugar Pulled Chicken

    Sorry for the delay! Yesterday took more out of me than expected, but I got some quality time in with family. I got to deflect emotions with humor. I also got to bring some pulled chicken to my fabulous neighbors AND got baby snuggles for a hot minute. So, ya know, I recouped.

    On to the food porn!

    The software:
    • 1/4 c. tomato paste
    • 3 tbs soy sauce
    • 3 tbs balsamic vinegar
    • 1 tbs Worcestershire sauce
    • 1 tsp chili powder
    • 1 tsp smoked paprika
    • 1 tsp garlic powder
    • 1/3 c. brown sugar, packed
    • 12 oz. porter beer
    • 6 boneless/skinless chicken thighs
    • Slider buns if you want to holla at some sammiches
    The hardware:
    • Crock Pot
    • mixing bowl
    • whisk
    • measuring spoons/cups
    • large mixing spoon
    • 2 forks
    • 1 plate
    • CROCK POT LINER. Seriously, y'all. Hop on this. It makes clean up 1,000 times easier. I have never had one break, melt, get maimed, whatever. Whoever invented these deserves a Nobel Peace Prize for bringing harmony into homes.
    The cast of characters, if you will.

    Right off the bat, you can see I went rouge. I can't help it. I forgot the Worcestershire sauce. I also thought I had chili powder and paprika. I was wrong. So I used a few dashes of cayenne instead. I also added salt and pepper, BECAUSE WHEN DO YOU NOT ADD SALT AND PEPPER?!?!?! I used reduced sodium soy sauce which is part of the reason I felt the true spirit of #yolo when adding salt.

    Let's get cookin'. The original directions are:

    1. Whisk together everything but the beer and chicken.
    2. Add sauce, chicken, and beer to the crock.
    3. Cook on low ~4 hours or until chicken pulls apart easily with a fork Dinglehopper fork (or if you are my mom, a faaaahk).
    4. Using 2 forks, shred chicken.
    I continued my rogue streak and did things differently. My version:
    1. Whisk together everything but brown sugar and beer. The teeny tiny can I had measured 2 tablespoon more than needed. I felt it was negligible and added the whole thing. More of that #yolo swag.
    2. Pack that brown sugar! Whisk it in. At this point, it was not a sauce. It was a paste. I decided it needed to be thinned out before hitting the crock.
    3. Whisk in the beer. Make sure to scrape the sides.
    4. Line dat crock, yo'!
    5. Pour half of the sauce into the crock. Put the chicken in, tossing it to make sure it is covered in sauce. I had boneless/skinless chicken breast and not thighs. Whoops.
    6. Pour the rest of the sauce in, covering the chicken. Using the mixing spoon, tuck the chicken into its saucy bath.
      Cover. Set it on low. Forget it. Well, kind of. I cooked this from around 10 PM until about 5:45 AM. Mostly because that is when I woke up to pee. Around 1 AM, I turned the breasts (of which there were approx. 4). I then turned it to warm so I could grab some more z's.
    7. At about 8:45 AM, I got up for real to get to shredding. I pissed off the cats by refusing to feed them but the smell of deliciousness seemed to mellow them out as they mewed in vain, pleading for a morsel or two. #sorrynotsorry I grabbed a plate and shredded it a breast at a time, throwing the shreds back into the sauce, mixing well so every one was covered. I kept the crock on warm until we left around 9:30 AM and put it back on a few hours later after the services. Apologies. This is where my pictures end.


    Results:
    I felt it was a little too...tangy. I assume this is where my tomato paste #yolo moment backfired. However, plenty of other people enjoyed it. Honestly, I would up the garlic next time and maybe add a little more sugar to cut the tang. The Husband suggested using a different beer as he felt the porter was too assertive. He suggested maybe a stout. I suggested maybe a different porter or whatever beer is on hand.

    Would I do it again? Heck yes. It was tasty, fairly inexpensive as most of it is pantry staples for us. I almost always have brown sugar and there will never be a day when my house is barren of soy sauce. We had some balsamic on hand too. It was independently verified as delicious by family members that don't have to tell me they like what I make.
     
    I declare this as a win.

    Tuesday, February 10, 2015

    Introducing Pinterest Diaries

    Often, I like to think I can craft. Sometimes this is a big win. Other times, not so much. Whether trying new stuff in the kitchen or trying not to get craft herpes (it's ok glitter, you're still my favorite color) all over the damn place, Pinterest has given us would be crafters/home cooks/DIY-ers a place to revel.

    You can find EVERYTHING on Pinterest. Cute dogs? You got it. Cosplay ideas. Boom. Done. Quick dinner ideas? Holla! Gadgets and gizmos? A plenty. Whozits and whatsits? Galore. Thingamabobs? At least twenty.

    I have talked about wanting to DIY a lot of stuff on my 30 Before 30/soon to be 35 Before 35, as well as wanting to expand on what I make in the kitchen-new recipes and ingredients. I have decided to add a new, reoccurring post theme to display the new things I make. The good, the bad, the inedible, the ugly, the everything.

    I get my first chance at a new Pinterest recipe tonight. I needed a hot dish to bring to the coalition (or if you are me and can't take death seriously, the funeral after party) for my Uncle. I chose a pulled chicken made with brown sugar and beer. Beer? Yes. Good for an after party, right? Especially for this Uncle. George, while he stopped drinking later in life, gave me the best beer advice I have ever received--and it was at the tender age of 8: Don't wash down a package of Oreos with a 6 pack of beer. You'll get a hell of a hangover!*

    So, tonight or tomorrow I will have my first installment of the Pinterest Diaries-Beer and Brown Sugar Pulled Chicken. And if it comes out a hot mess? I'll have to get real friggin' creative, real friggin' early in the morning.


    *I have taken this advice seriously and have never washed Oreos down with beer. I stick to milk. Good lookin' out, Uncle George. <3