Showing posts with label gluten free. Show all posts

Friday, February 12, 2016

Pinterest Diaries: Quinoa Pizza Bites


Winter is a tough time for me. I feel like it is for most people living in areas where there isn’t much sun or warmth. Luckily, it has been much warmer than usual but as we here in Massachusetts get ready to brace ourselves for a Valentine’s weekend where the temps will go below zero I want to talk about something that warms my heart. Something that comforts me and doesn’t judge me, a true beacon of hope when all else seems amiss - and that, friends, is Pizza.


I love pizza. You know those people who say there is no such thing as bad pizza? I disagree. There are varying degrees of goodness and so much to consider - sauce, cheese blend, cheese stretch, crust, toppings, things to shake on it, things for it to be dipped in… It is enough to make this fat girl cry. I eat all kinds of pizza from like really high quality to really shitty take out to an array of frozen. [PSA: If you need a frozen pizza and can be ok with spending like $9 on it, PLEASE try Screamin’ Sicilian. Hands down the best frozen pizza I have ever had. One I would eat over some take out places.] I will take it in any form. I love pizza rolls and pizza-dillas equally. Deep dish or thin crust, I DGAF - just gimme dat pie!


If you have been here before, you may be wondering how I eat all this pizza and keep talking about being Gluten Free. The answer is that there are a few things in this world where I will invoke #YOLO and eat wheat only to *sometimes* regret it later (sometimes I find it worth it. DON’T BE LIKE ME. BE STRONGER THAN THAT). Pizza is at the top of my list. With the winter woes taking hold I have been extra hard on myself about this. Some of it is purely economical because GF stuff, especially GOOD GF stuff, is often pricier. Some of it is that I prefer to cram feelings and insecurities down by way of food. I decided I needed an easy way to get pizza without wanting to die after.


I pinned a recipe for Quinoa Pizza Bites a few weeks ago and decided to give it a try. It seemed fairly inexpensive and easy to do, which it was. It called for a mini muffin pan and if you have one I highly suggest using it to avoid touching the raw mixture. They were really good, held their shape well, and were filling. The Husband annihilated them, so two thumbs up from them? It is easily something you could make vegetarian as well. Maybe vegan? But I am not really sure if there is a vegan substitute for eggs and didn’t research that before writing this (sorry!).


Ingredients
1 cup of cooked Quinoa (I used white and the recipe calls for that but I feel like this could be mad good with couscous or another type or quinoa. Shit, even rice. **I did NOT cook this ahead of time, which I told myself to do multiple times. I suggest doing it ahead of time so it is easy to handle)
⅓ cup of pepperoni (I used sliced pizza pepperoni that I cut up. I could see how using a stick would also be good)
3 large eggs (I used 2 because I DO WHAT I WANT, RECIPE. DON’T TELL ME WHAT TO…. oh, that is what you are there for)
1 Cup of mozzarella
¼ tsp salt
Optional: Marinara/spaghetti/pizza sauce for dip dips


Cook the quinoa as directed on the package. If you are Fancy AF like me, substitute stock for water to impart more flavor on those magic grains. Again, I suggest doing this ahead of time and letting it cool.


Preheat your oven to 350.


Chop up your pepperoni. I cut them in stacks into four strips then in half.

This is where I went rouge. Unless this is your first time reading a recipe here, you are probably surprised it took this long but I supposed not pre-cooking the quinoa was my first step to being a rebel.


It calls for ⅓ cup. I used about half. Maybe more. I also suggest making sure there is some for your snacking pleasure.


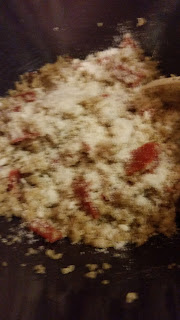
Season your quinoa. I don’t know if you noticed the lack of seasoning listed above. WHAT MONSTER DOESN’T SEASON SOMETHING? NOT ONE SINGLE GRAIN OF GARLIC POWDER MENTIONED?IN WHAT WORLD IS THE HOLY TRINITY NOT A STAPLE? One I don’t want to live in, clearly. I added salt, pepper, garlic powder, basil, and red pepper flakes… and some parmesan cheese. Mix and taste. Add more as needed. One thing I wish I knew ahead of time was that after the eggs are added and it bakes, the flavor mellows out A LOT. So bump up that flavor.

Add pepperoni and cheese. I didn’t measure and just threw in a few paws full... Nor did I use a straight mozzarella cheese. I went Italian style blend. I feel like my batch needed more cheese but that is possibly my own fault for not following directions. Combine.
 

Crack on your eggs and mix well.


If you are a super adult and have a mini muffin pan, spray it with cooking spray and fill it. If you suck at adulting, like me, get ready to hate everything. Just going to free ball it? (Literally. Make balls of this mixture free hand. Pervs.) Dig in. I rolled balls of the mix together then formed weird blobs that were vaguely cookie-esque/cake like. Place these mounds of terrifying texture (which I promise is 10 times better when cooked) on a cookie sheet that you have sprayed with cooking spray.

The recipe said to bake for 25-30 minutes or until browned. I would say I had these in for about 35. I was not satisfied with the browning but they smelled really good and to be honest I find the scent of pepperoni too intoxicating to be patient.

It then suggests you remove the bites and put them on a cooling rack. I chose to pile them on a plate and get to eatin’. You chose.

Wednesday, September 30, 2015

Pinterest Diaries: Enchilada Dip

**Hey, Friends!
I am heading to Flo.Rida (Am I the only one that finds that hilarious?) until Monday. I will be posting pictures and videos on my Instagram and Snapchat (username on both: whofavorsfire). There may be a day at Disneyworld while I am there, so get ready for magical Halloween-y overload!

While I am away, I am going to try this post scheduling tool here on the blog AND on the FB. The posts will be a few food tutorials and post about media I am into. Hoping it goes off without a hitch!

For Labor Day, we had a family shindig and I decided to flex my appetizer skills by making a dip. I scoured the internet looking for something tasty and stumbled across enchilada dip. I LOVE ENCHILADAS. I keep enchilada sauce on hand at all times. Casserole, mixed into Mexican themed rice, mixed into sour cream for added zip, or even just regular enchiladas. I don't discriminate. Get in my belly. Right meow.

After discussing if this was a good plan with The Husband, I took a trip to Trader Joe's to get some stuff.  Here is what the recipe called for:

  • 1½ - 2 pounds ground beef
  • ½ medium onion, diced
  • 2 cloves garlic, minced
  • 2 cups enchilada sauce
  • 2 cups grated Monterrey Jack or cheddar cheese
  • Sour Cream (optional)
  • Tortilla Chips (optional)

  •  
    In my head, I had an idea of what was needed. I know how to make enchiladas and I know how to make dip. So I went into the store sans list. Whoops. I went rogue much sooner than usual. I ended up with:


    Anyone versed in the world of dip making knows that a traditional creamy dip has at least two of the following in it: Sour Cream, Cream Cheese, or Mayonnaise. Consider this dip's holy trinity. I didn't realize heading in that this "dip" I found broke the sacred rule. I ended up using sour cream and cream cheese because #yolo, that's why. I also decided to add bell pepper, beans, and corn to make it a bit more hearty. I also swapped ground beef for ground turkey and used a mix of red and green enchilada sauce. PLEASE MAKE SURE TO READ YOUR LABELS IF YOU HAVE DIETARY ISSUES. After eating a metric shitload of this dip, I got really sick. The extremely delicious Trader Joe's enchilada sauce (my g-d go to sauce) has wheat in it. Use a GF sauce if you need to steer clear of those amber waves of grain.

    Let's get down to business (to defeat the huns? #accidentalDisneying):

    The recipe's instructions:
    1. Brown ground beef in a large skillet. Drain. Add in onion and garlic and cook until tender, about 3 minutes. Stir in enchilada sauce and top with grated cheese. Cover and allow cheese to melt, about 3 more minutes.
    2. Top with sour cream and serve with tortilla chips.
     
    TOO EASY. NOT TASTY ENOUGH. MPA MAD! MPA SMASH PUNY RULES!
     
    Here is how I did it:
     
    1. Heat olive oil in wok. Add turkey. Break it up and season with salt, pepper, garlic powder, and cumin.
     
    2. While that is browning, prep your veg. I bought pre-diced onion so I just had the pepper. De-seed and de-rib, dice.
     
    3. Once the turkey is cooked through and browned some, drain. Leave in colander until needed.

    4. Add a smidge more oil to the wok. Toss in onion and pepper. Hold off on seasoning until they cook down. Then add some salt, pepper, garlic powder, and cumin.


    5. Add beans and corn. Cook until they are warmed through.
                                             
     
    6. Add turkey and mix together. Add in enchilada sauce and cook down for 5 or so minutes, stirring occasionally. Taste and season as needed/if needed.
     
    7. Add shredded cheese and mix until melted.
    8. Add cream cheese and mix until melted and incorporated through entire dip. Then add about 1/4 cup of sour cream (this was eyeballed, using a fork because I am nothing if not a scientist) and mix.                                         

    9. Grab some chips and enjoy.


    Monday, March 30, 2015

    New Recipe: "Quick" Jambalaya

    I lost my jambalaya recipe. It was really tasty and I forgave its use of instant rice because of that. I thought it would be a good dinner to try again as it would yield plenty of leftovers for lunch (or repurposed for other dinners). I searched the internet for a recipe that wouldn't be super time consuming but would be super tasty. Martha Stewart's website had a "quick" version that I used. It was tasty and yielded plenty of dinner with leftovers for 4 lunches (or 2 each for 2 people). Not too shabby. Luckily I had a bunch of the ingredients on hand, which made this a fairly inexpensive dish. I would do it again. I might change out the meats I used to get a little cray or go all veg for a healthier choice.

    Pros to this recipe?
    -Fairly quick to make. You can prep as things are cooking.
    -Easy to make vegetarian or to fit dietary restrictions and or allergies.
    -Even though you are cooking bell peppers FOR EVER, the entire pot doesn't smell like them or taste of them (Low Level of Pepper Infiltration).
    -The yield is unbelievable (see breakdown below).
    -Easy to repurpose.
    -Low cost. Uses a lot of pantry staples.

    Cons?
    -The rice didn't cook evenly but it didn't effect the overall taste.

    Bonus?
    I ONLY USED ONE COOKING VESSEL.

    Here's how you do it:


    Ingredients
    • Oil. I used a little EVOO, but any you have it totes fine.
    • 1 lb skinless chicken breast halves. I used 2 whole breasts from the freezer.
    • 3 celery stalks, finely chopped
    • 1 medium onion, finely chopped
    • 1 green bell pepper, stemmed/seeded, finely chopped
    • 1 lb Andouille sausage, cut into 1/2 inch pieces. I got Chicken Andouille.
    • 2 garlic cloves, minced.
    • 2 cups of home made or low sodium chicken stock
    • 3/4 teaspoon of Old Bay. I don't stock Old Bay at home so I used Cajun seasoning
    • 14 oz can of crushed tomatoes. I had a 14 oz can of diced and used that instead. DON'T DRAIN!
    • 1 cup of long grain rice
    • Salt and pepper
    • Optional: other "traditional" jambalaya meats are tasso ham and/or shrimp.
    • Also Optional: hot sauce. I put in a few dashes to amp up the spice.

    Steps

    -Heat oil over medium heat. Season chicken with salt and pepper (or if you are feeling fancy: Salt, Pepper, Cajun Seasoning, and Garlic Powder). Add chicken to hot pan.


    -Cook chicken until golden brown, ~5 minutes per side.


    -Cut into 3/4 inch pieces and set aside. (I cut them before cooking. Whichever you prefer!)

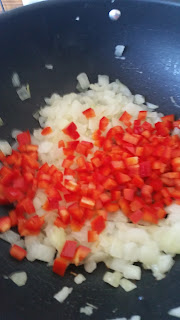
    -Add cut veggies and cook, stirring, for ~5 minutes.
     
     
    -Add sausage and cook mixture for ~3 minutes. ( I cooked this a few minutes longer to try to develop some caramelization)
     
    -Stir in stock, Old Bay, Tomatoes, and Water. Bring to a boil.


    Ooooh, a Three-fer
     
     
    -Add rice and chicken. Reduce to simmer. Simmer for 5 minutes.
     
     
    -Cover and remove from heat. Let stand until rice is tendah and liquid is mostly absorbed, about 30-35 minutes. Season to taste.
     
     
    This beaut is the almost finished product.
     
     
    How this meal was used:
     
    Lunches: 4 fairly large portions.
    Dinners: 4 fairly large portions.
    Uses/Repurposes: Night of dinner - as it was/served with tortillas/one burrito. A second dinner was created for one by reheating and adding over easy eggs on top (because yolks make everything better). Lunches - as it was.
     
     
    8 meals achieved from one recipe. If I was better at portioning, I would assume 10 could be achieved.
     
     
    Not too shabby. I would do it again. In fact, The Husband has requested I do. 
    

    Wednesday, March 4, 2015

    Even the Mighty Baker Falls

    Even the mightiest of home cooks/bakers fail. And that is what I did. Not only do I not have the Pinterest Diaries entry on Pink Ombre frosting... I didn't even bring a home baked cake to the Christening. Ready for the deets of this shit show?
     
    Good. It's pretty sad/hilarious.
     
    The terror starts at Whole Foods. I leave my phone in the car, prompting The Husband to come into the store. Our rule is that if I go in alone, he texts me his parking location. Pretty reasonable if you ask me.
     
    If a store is packed, my anxiety goes crazy. My fight or flight instincts cross and they create a level of crazy unseen by many. Naturally, very person who shops at WF was there. I make my way to the cake mixes. I have tried 2 mixes and have only liked 1 (Pamela's). A beautiful sight is before me: a row of Pamela's mixes. I scan them. I scan them again. How about one more time? I push them around to look behind them. There is no white/vanilla cake mix. This is when I start sweating. I look at the other mixes. They only yield 1 cake round and I need two. I am most certainly not paying $5.99 (which is typical of GF mix) each for 2 packs. He asks why I don't just make a regular cake. BECAUSE IF I AM MAKING IT, I DAMN WELL BETTER GET TO EAT SOME OF IT.

    This is when I start losing it. The Husband urges me to just pick one. My reaction is akin to "YOU KNOW NOTHING, JON SNOW!" He picks the only other brand that yields 2 rounds: Namaste. I continue freaking out, all the way to the dairy section because not all GF mixes are created equally. Once I can breathe and think, I explain my issue. One can buy all the regular cakes mixes a store has to offer and they will be relatively the same once baked. Relatively. This does not exist in the world of GF products. If it has garbanzo bean flour, it can taste weirdly of fish. Different flours and ratios of flours to gums makes each mix unique. Each box/pack is either wonderful or a ticking time bomb of AWFUL. We get it with the provision that he will run to another store if it doesn't come out well.
     
    We get home and I have tucked a prior to WF purchased maple bacon frosted donut in my purse. I decide to lie down and cry because panic does that to you. The Husband stays with me. I notice the bed is devoid of cats but figure they are laying in the last sun beams of the day. After about an hour, we get up. The large cat has eaten the donut. The donut I was about to eat, wheat be damned, to cheer me up. The Husband even sniffed the cat's breath. It was maple and bacon scented. I am done with everything at this point. A pizza will be ordered and I will bake later.
     
    I should have known when I tried the batter that this was a no-go situation. It was gritty like corn bread, which is weird because the mix is corn-free. It doesn't taste sweet or particularly vanilla like. And there is a flavor I can't identify but will qualify as vaguely hippie. I bake it and hope for the best.
     
    At the low end of the bake times listed, it is ready. I take it out and let it cool. The Husband and I taste it... and it tastes kind of like nothing. Like cakey corn bread with much less flavor. We decide this will not work for the event and begin forming a back-up plan. My back-up plan is Coffee Time Bakery in Salem. They are open crazy hours everyday and everything they make is delicious. Not GF but delicious. One strawberry shortcake picked up on the way to church later, everyone loves the cake and things are better but no ombre frosting tutorial. Which is probably better because I forgot to get the food coloring I needed anyway...


    TL;DR? GF cake mixes aren't created equally. Have a back-up plan.
     

    Monday, June 30, 2014

    Sometimes I Drop the Ball

    I posted a Thirty Before Thirty.

    I have accomplished one thing-the drastic hair do. Started journaling, stopped. Started reading, keep getting side tracked.

    In this time, I have inspired others to make their own lists. Win?

    We are rapidly approaching my 29th birthday and I feel like my own goals are causing me to be hyper-worried about the big three-oh.

    After much thought (and, admittedly, a few tears), I think I need to reassess my TBT goals. I don't think I am in the same place as I was when I made the original list, nor do I think all of the same things are important to me.

    I have been spending a lot of my time wondering what I should do with my life (in terms of school and work, things of that nature). Some of it is beneficial and some not so much. It also doesn't help that I feel like absolute garbage. I haven't been watching what I eat and have been eating way too much gluten. I am starting to feel sluggish and exhausted constantly in addition to all of the fun that accompanies eating wheat-y things.

    So, here is to reassessing as we change. To picking up our pieces when we fall apart and to trying to reconcile that to be human is to make some mistakes.

    Thursday, May 29, 2014

    Asian Food Love, or How to DIY Ramen

    Lately, I have had an insatiable need to eat Asian food. All of it. Pho? Yes, please. Chinese everything? I'm on it. Dumplings? Lawwwwwwd. I love dumplings. And ramen. Sushi. You name it, I want it IN MY BELLY, right meow.

    Happy Dumplings in Gloucester (https://www.facebook.com/#!/Happy.dumplings.gloucester) is my jam. They have insanely good dumplings of the traditional (pork and cabbage, pork and chinese chives) and untraditional (beef taco is soooooooooooo good). Their dipping sauces are ON POINT. The steak and cheese eggrolls come with a horseradish dressing that is perfection. They have spicy ramen with beef or pork that you can pick you can customize by picking your noodle type (lemme holla at them (gluten free!) rice noodles, plz). Soft boiled egg, bean sprouts, bok choy (may be even DJ Baby Bok Choy)... My brothy dreams are made of this.

    But their hours, at least for this month, don't jive with my work schedule. My wallet doesn't want to shell out for take-out elsewhere when this is all I want. AND I certainly don't want the pre-packaged stuff at the store, even if it is $0.60 a package. There is like 2400 grams of sodium in that! And the noodles aren't gluten free.

    What's a frugal bitch to do? Make that shit yo'self, gurrrrrrrl... And by shit, I mean ramen. Dumplings are too time consuming for a week night. Is it authenic? Naw. But is it tasty? Hell yes.

    Here's what you need:
    1 carton of Trader Joe's Miso Ginger Broth
    2 baby bok choy, cut as small or large as you like. Feel free to use more. I wasn't sure how The Husband would feel about this so I went light.
    1 package of shitake mushrooms. I got mine pre-cut.
    Garlic
    Soy sauce
    1 package of firm or extra firm tofu (I don't remeber what I used), drained, pressed, and cut into cubes
    Half a package of bean sprouts
    Sesame Oil
    Hot Sesame Oil
    Sriracha (gotta get my rooster on)
    Olive oil
    Salt, pepper, garlic powder (The Holy Trinity)
    Half a package of rice noodles
    Eggs
    A pinch of sugar
    White vinegar--OPTIONAL

    How to jerry-rig some ramen:

    1. In a bowl, whisk together soy sauce, sesame oil, sriracha, and The Holy Trinity. Give it a try and add more to suit your taste. Toss cubed tofu in this. I poured the tofu and sauce into a large ziploc and upt aside until I was ready for it.
    2. Empty the broth into a large pot. Set the burner on low. Stir occaisonally.
    3. In a frying pan, heat some olive oil, sesame oil, and hot sesame oil on medium to medium high heat. Toss the mushrooms and baby bok choy in this to coat. Season with The Holy Trinity.
    4. In a medium pot, cook rice noodle as directed on package. (Boil water, add noodles, cook for 3 minutes, drain)
    5. Add garlic to the veggie mix (and more oil if needed. On the second go of oil I used Olive and regular Sesame). I love garlic. I have one of those large jars of minced garlic and added two heaping table spoons. Mix together and add bean sprouts. Cook until bok choy is tender. (I like mine a little crunchy)
    6. Add veggies to broth.
    7. Into same frying pan, dump tofu and marinade. Cook until hot, turning to get sides browned.
    8. When noodles are done, add to large pot and mix well. Bring het up to medium high. Add a few dashes of soy sauce.
    9. Add Water to the noodle pot and a capful or so of white vinegar. Once the water is simmering, poach them eggs!
    10. Ladle out some ramen. Make sure to get some of everything! Spoon some tofu over the top. Add your poached eggs.
    11. Send me a thank you email.